
It stated with a need to clean up my yard, and the catalyst was the retired neighbor who was working on their yard.
My retired neighbor of course hired a crew to rebuild her patio and re-landscape the whole front yard; I came home from work to find this 3-man crew filling a truck with dirt. I of course wanted to do a bit of landscaping along a certain part of my fence which of course need a large amount of filler dirt, so I walked across the street and ask about the destination of the dirt they were removing from my neighbors yard. The conversation was short, as their spanglish was weak, but ultimately ended with 4 bobcat buckets full of dirt being dumped onto my driveway, this was the beginning of the flowerbed.
Step 1 planning
Take your time with this step, as it is the foundation for the results.
The flowerbed is about 4 ft by 30 ft with a 6-ft section that angles out toward the yard; this equates to about 1.6 yards of dirt, which is about 4 buckets on a bobcat. The back part of the flower bed needs 1x6’s so the dirt doesn’t push up next to the very expensive fence we had installed last year, the front will be 2 x 10’s that were nailed to 2 ft stakes that were pounded into the ground. “Yeah that should work.” I thought, after a few pencil drawings on blank paper while I was sitting at work. The plan was set.
Step 2 materials

Acquire all the materials first, you should have a good idea of material from the planning stage and do so shopping to get prices, my whole project cost under $100
1. 1x6x8 Qty 6
2. 2x4x8 Qty 4
3. 2x12x8 Qty 5
4. Exterior nails for my porter cable nail gun (the greatest tool I own)
5. A saw capable of handling treated lumber
1. 1x6x8 Qty 6
2. 2x4x8 Qty 4
3. 2x12x8 Qty 5
4. Exterior nails for my porter cable nail gun (the greatest tool I own)
5. A saw capable of handling treated lumber

6. An 8 LB mall for pounding in 2x4 stakes
7. Bubble level
8. Tape measure
9. Mason’s line or chalk line
10. Dirt lots of it. (I got this for free from a neighbor, craigslist.com is full of people giving about dirty, or wood, or landscape blocks you just need to go get them.)
11. And an assortment of other small tools that I don’t think I even used.
Step 3 action

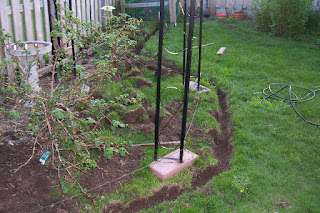
The basic idea is to dig a trench put in the 2x10 so there is about 6 inches above the ground, pound some stakes, attach the boarder and fill with dirt.
1. This mean you have to dig in a straight line, so use a chalk line or masons line on stakes to keep you in a straight line when digging.
 3. Once the trench is dug the board is set in place and “leveled”. Cut the 2x4’s at 24 inches long and angle one end to make a point, these stakes need to be pounded down so they don’t stick out of the ground above the 2x10. Some one with good endurance is very handy here. DO NOT DIG THE HOLE for the 2x4’s this weakens the ground around the stake and it will not hold the pressure of the dirt against the 2x10’s.
1. This mean you have to dig in a straight line, so use a chalk line or masons line on stakes to keep you in a straight line when digging.
2. Once the boarder has been dug set in the 2 x 10 to make sure it fits and there is 6 inches of height along the length of the board, if not, fill under the board to raise it or dig a little more to lower it. Side note, my yard has a slope the entire length side to side so making the boards level would not work.
3. Once the trench is dug the board is set in place and “leveled”. Cut the 2x4’s at 24 inches long and angle one end to make a point, these stakes need to be pounded down so they don’t stick out of the ground above the 2x10. Some one with good endurance is very handy here. DO NOT DIG THE HOLE for the 2x4’s this weakens the ground around the stake and it will not hold the pressure of the dirt against the 2x10’s. 4. Now the stakes are pounded down the 2x10
 front boarder can be nailed to the stakes.
 Please use caution when handling power tools. I used a framing nailer with exterior ring shank nails, these nails have ridges on the shank of the nail so they don’t back out of the wood easily, screws can also be used but pilot holes should be made so when the wood dries out it doesn’t split. Make sure the board ends meet flush together and are the same height or your boarder won’t look very good.
5. As part of my project I had to put 1 x 6’s along the back part of the fence so the dirt wouldn’t touch and rot my fence, I installed the back boarder after the front boarder. I nailed up 1x6’s to the 4 x 4 fence posts that were already existing.


6. Now for the hard part, the dirt, once the boarder was nailed in all the way around, it was time to haul dirt from my driveway to the flowerbed. I used a heavy-duty wagon and 2 garbage cans to haul the dirt. This worked pretty well, but it was hard work and took a while, 2 days to be exact. Once the dirt is in place you can expect some settling so be sure to add more dirt later. In my situation, after I plant what I want I am going to put landscape fabric and wood chips on top to help the ground retain water for the plants and control weeds. 

please leave comments on my handy work or my article.


please leave comments on my handy work or my article.
No comments:
Post a Comment